Trimming for Airflow and Aerodynamics in the Smoker
What you'll learn
 Brisket trimming techniquesRib trimming strategiesAerodynamics in smokingPreventing burnt edges
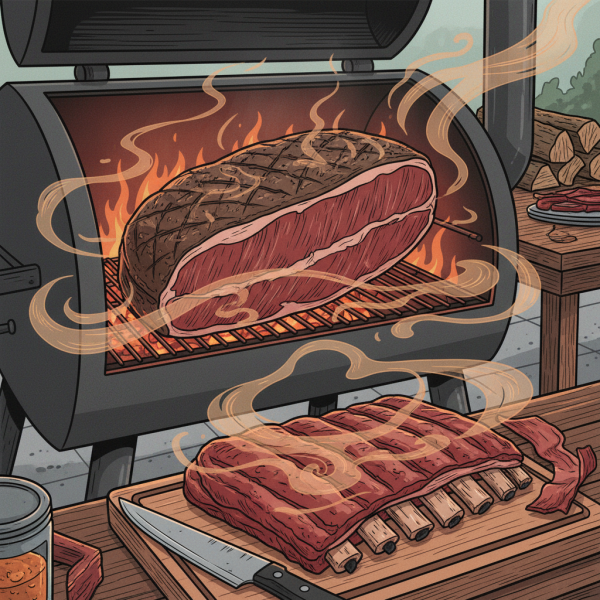
For outdoor cooks who live for the low and slow rhythm of a smoker, the pursuit of perfection often hinges on details that extend beyond rub recipes and wood selection. One such critical, yet often overlooked, detail is the art of trimming your meat. Far from being just about aesthetics, strategic trimming of briskets and ribs plays a pivotal role in the aerodynamics within your smoker, directly influencing how heat and smoke circulate around your prized cuts. Proper trimming ensures even cooking, maximizes bark development, and crucially, prevents those frustrating burnt or dried-out edges that can mar an otherwise magnificent meal. It's about setting your meat up for success from the moment it enters the smoky chamber.
The Science of Airflow in Your Smoker
Imagine your smoker as a miniature wind tunnel, where heat and smoke are the currents. When you place an irregularly shaped piece of meat inside, it acts as an obstruction. Protruding thin edges, pockets of excess fat, and uneven surfaces can disrupt the smooth flow of this hot, smoky air. This disruption leads to hot spots and cold spots on the meat itself. Areas exposed to excessive, unrestricted airflow tend to cook faster and dry out, while shielded areas may lag behind, leading to an unevenly cooked product.
The goal of trimming, therefore, is to create a more uniform shape, allowing the heat and smoke to envelop the entire cut consistently. This promotes even rendering of fat, uniform bark formation, and a more predictable cooking process. It's not about removing as much as possible, but rather intelligently shaping the meat to interact optimally with its cooking environment.
Brisket Trimming for Aerodynamic Excellence
Brisket, the king of BBQ, demands meticulous attention to trimming. It's a large, often unwieldy cut with varying fat concentrations and muscle structures. Getting it right is paramount for that succulent, tender result.
Addressing the Fat Cap
The fat cap on a brisket is essential for moisture and flavor, but too much can hinder bark development and prevent smoke penetration. Aim for a uniform fat cap of about 1/4 to 1/2 inch across the entire flat. Use a sharp, flexible boning knife, working slowly and deliberately. If the fat cap is thicker in some areas, reduce it. If it's too thin, especially on the flat, be mindful not to remove too much muscle.
Shaping the Point
The brisket point is typically thicker and fattier than the flat. Trim any hard, thick pieces of fat that won't render down during the cook. These can create a barrier for smoke and heat. Also, look for any silver skin or gristle that runs between the flat and the point; removing these helps with tenderness. The goal is to make the point flow smoothly into the flat, without abrupt edges or deep crevices.
Tackling the Edges and Corners
This is where aerodynamics truly come into play. Thin edges and corners of the flat are highly susceptible to drying out and burning because they have less mass and are more directly exposed to the smoker's heat. These areas act like fins, catching more airflow than the thicker parts of the brisket. To prevent this:
- Round off sharp corners: Gently round off all the corners of the brisket, especially on the flat. This eliminates small, thin areas that would otherwise crisp up and burn long before the rest of the brisket is done.
- Remove thin, papery sections: Any part of the flat that is excessively thin and appears almost translucent should be carefully removed. These pieces will dry out regardless of how well you manage your smoker's temperature.
- Undercutting the seam: Some pitmasters advocate for a slight undercut along the seam where the fat cap meets the muscle on the sides. This allows the fat to render and flow more efficiently without creating a dam that traps moisture or unevenly impacts the bark.
By creating a smoother, more aerodynamic profile, you ensure that heat and smoke pass over the brisket more uniformly, reducing the likelihood of overcooked edges and promoting consistent rendering across the entire cut.
Rib Trimming for Smoke and Bite
Ribs, whether baby back or spare, also benefit significantly from thoughtful trimming. While not as massive or complex as a brisket, proper rib trimming ensures better smoke penetration, more consistent cooking, and a more enjoyable eating experience.
Removing the Membrane
This is arguably the most crucial step for ribs. The membrane (or silverskin) on the bone side of the ribs is tough, impermeable, and prevents smoke and rub from penetrating the meat. It also becomes leathery and unpleasant to chew when cooked. To remove it:
- Use a butter knife or a spoon handle to pry up a corner of the membrane, usually near one of the middle bones.
- Once you have a small flap, grasp it firmly with a paper towel (for grip) and pull it slowly and steadily across the rack. It should come off in one or two pieces.
Removing the membrane allows smoke to infuse the meat more effectively and helps the ribs cook more evenly, improving tenderness.
Trimming Excess Fat and Loose Meat
Inspect both sides of the rib rack. Trim off any large, hard chunks of fat that won't render well. While some intercostal fat is desirable, thick surface fat can prevent bark formation. Also, remove any excessively loose or dangling pieces of meat or fat. These small bits will burn quickly and produce an unpleasant flavor, detracting from the overall presentation and taste of your ribs.
For spare ribs, you might also perform a "St. Louis cut" if it hasn't been done already. This involves squaring off the rack by removing the hard cartilage and skirt meat from the bone side. This creates a more uniform, rectangular shape which cooks more evenly and is easier to portion.
Squaring Off the Ends
Similar to brisket, any very thin, exposed ends of the rib rack are prone to drying out. While you don't need to round them as dramatically as a brisket, a slight squaring off or removal of tiny, bone-exposed tips can prevent them from becoming brittle and unappetizing.
Uniformity and Flavor
Investing a little extra time with your trimming knife before your meat hits the smoker is an investment in the final product. By intentionally shaping your brisket and ribs, you're not just preparing them; you're engineering them for optimal interaction with the hot, smoky environment. This thoughtful approach minimizes hot spots, encourages even rendering of fat, allows for consistent bark development, and ultimately, prevents those disappointing burnt or dried-out sections. The result is a much more uniform cook, from edge to edge, and a superior eating experience that truly showcases your pitmaster skills.
Summary of Trimming Techniques
In summary, achieving aerodynamic success in your smoker through proper trimming is a foundational skill for any serious outdoor cook. For brisket, this means aiming for a uniform 1/4 to 1/2 inch fat cap, meticulously rounding off thin edges and corners, and carefully shaping the point to eliminate obstructions. For ribs, the critical steps include removing the tough membrane from the bone side, trimming excess fat, and squaring off any thin ends to ensure even cooking and better smoke penetration. These practices collectively ensure that heat and smoke circulate efficiently around your meat, leading to a perfectly cooked, tender, and uniformly barked product without the frustration of burnt or dried-out sections.
Comprehension questions
 Why is even airflow important in a smoker when cooking large cuts of meat?What are the key areas to focus on when trimming a brisket for optimal airflow?How does removing the membrane from a rack of ribs contribute to better smoke penetration and texture?What is the primary benefit of rounding off thin edges and removing excess fat from brisket points?